Sunday late I grabbed a dye pot filled it up 3/4's full of black walnuts whole with the husks that were black, and also just the husks that were black. These were fresh from the big pile of nuts I had collected.
Monday I set up the big Weber grill with a big pot-old from water bath canning now a dye pot, and simmered it from early morning til late afternoon. I used a whole bag of charcoal in the process.
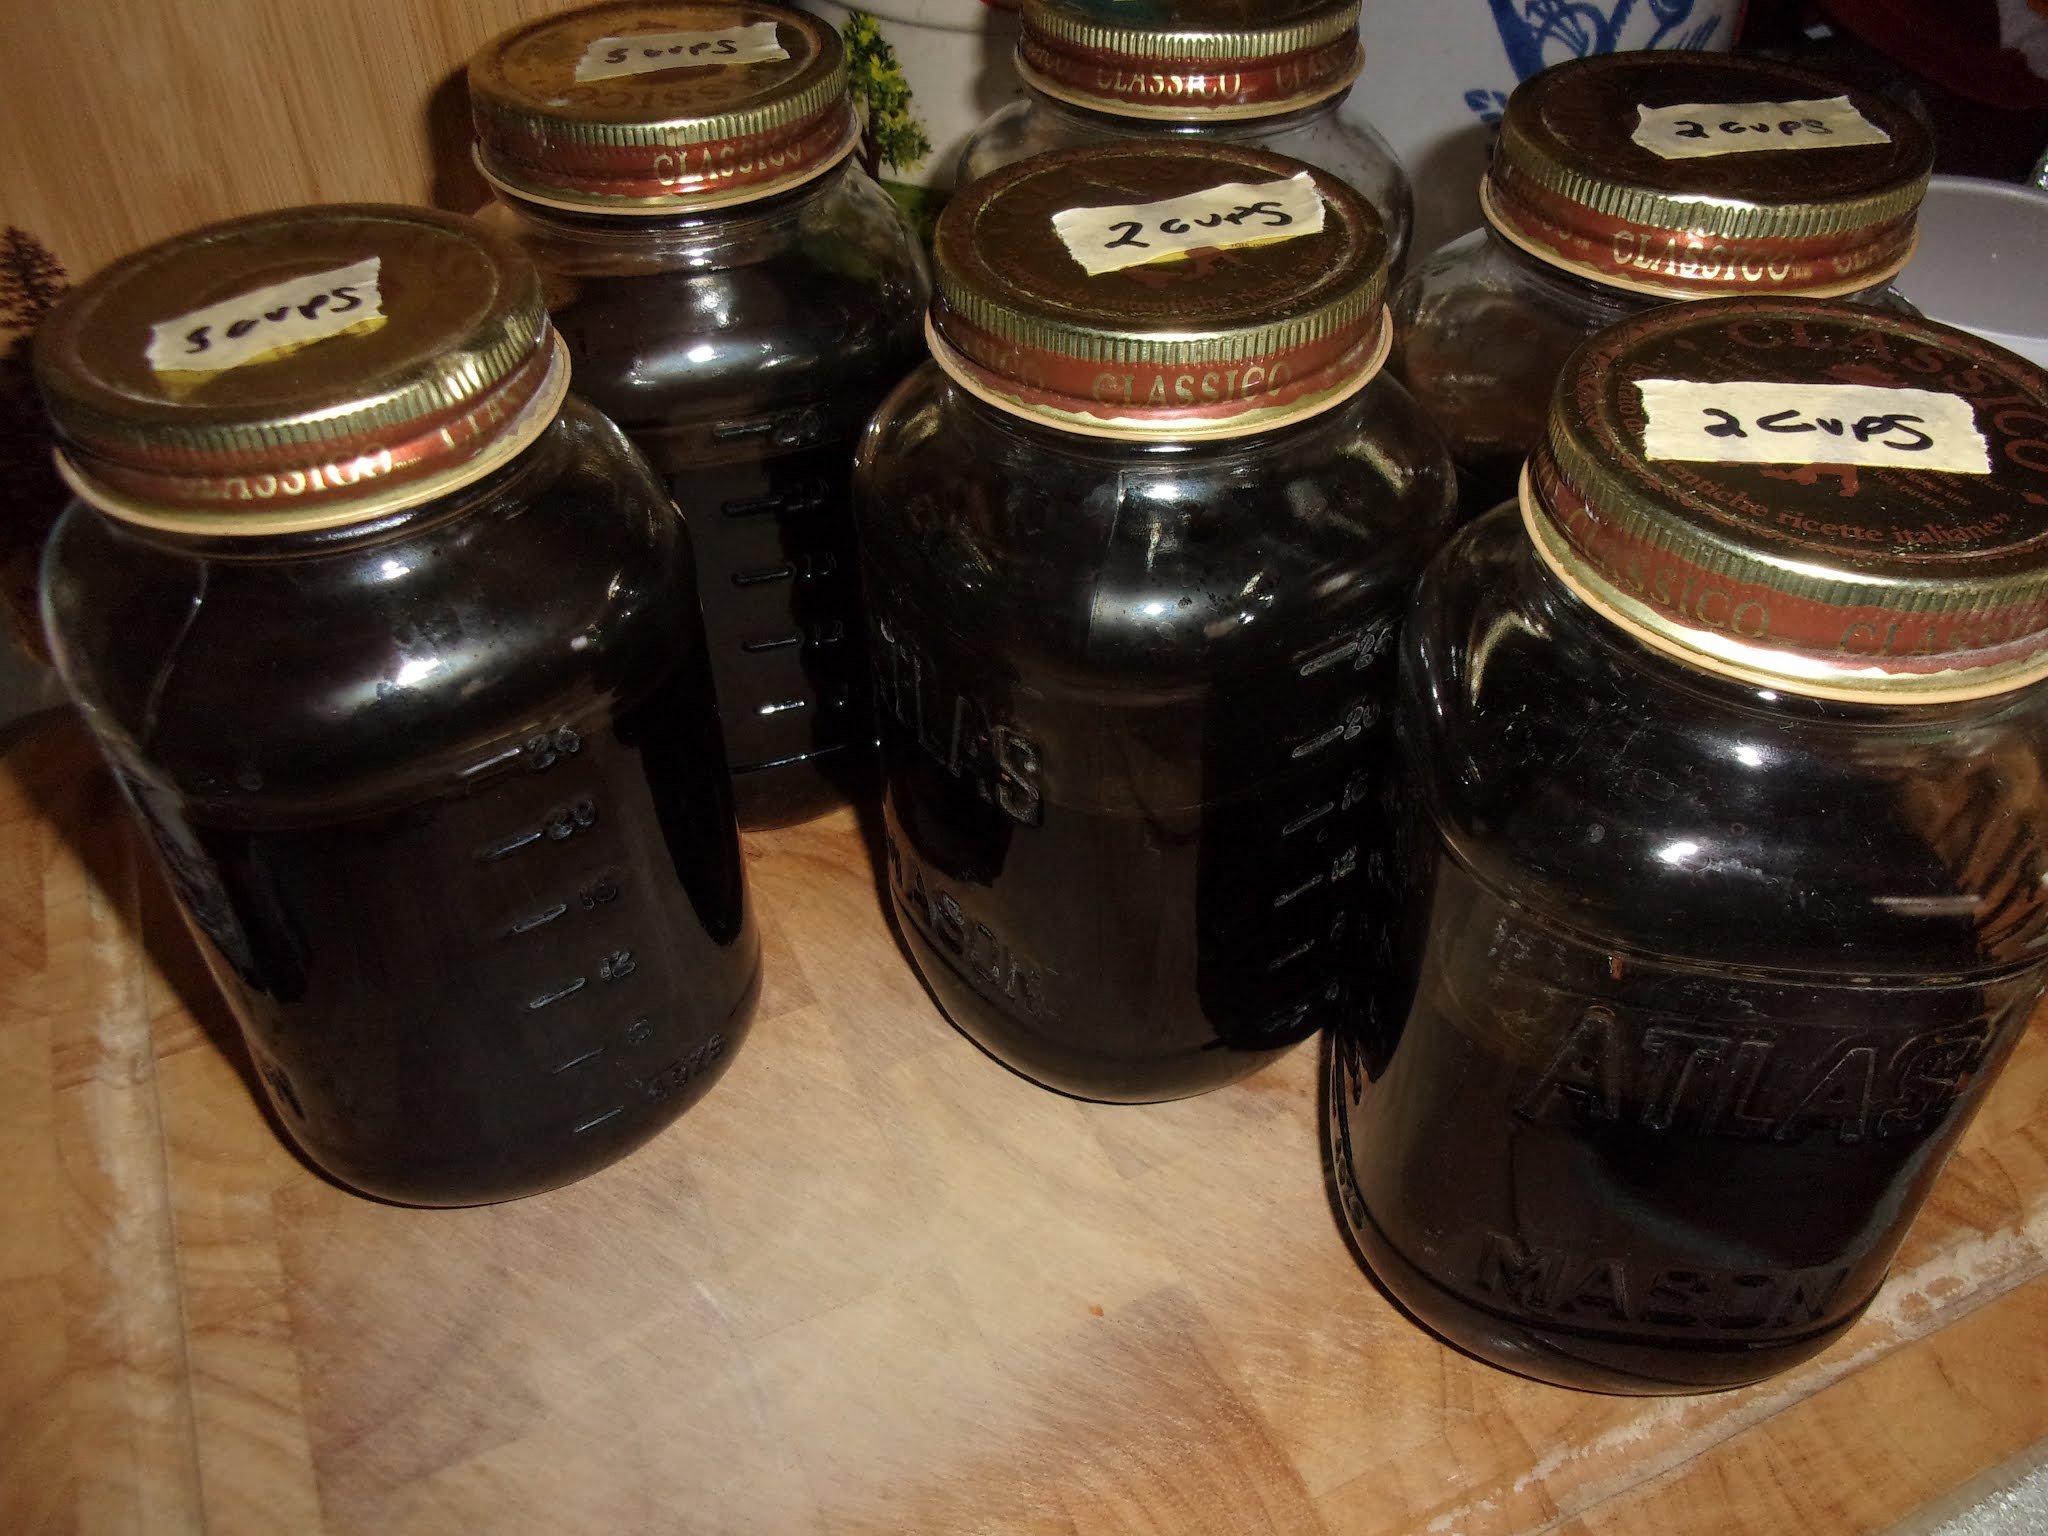
This was the dye pot that was full to the top with water and hulls, nuts


Today was such another warm day that instead of boiling the ink down again, I worked on the rock project. Finally got the stump that was in my way out of there, so now I am bringing up rocks, and am also needing to dig out some of the soil as well. I wanted to go back out late this afternoon but I am stiff and sore so my body is saying wait til tomorrow.
Of course I wanted to try out the ink. During my time reading lots of articles online, I ran into one that uses this on watercolor paper for drawing and painting. So I decided I wanted to try that.
I used a heavy watercolor paper, and added to my painting journal.
I stamped the leaves, acorn, and squirrel with regular ink, and then the tree I painted on the black walnut and stamped it. With a fine watercolor brush I filled in the stamped images, wrote Fall and made a few curvy lines to hopefully resemble some wind or movement in the leaves.


I took a photo of the lake out our windows this afternoon. Gorgeous colors this year. Last year they were mostly brown with no pretty fall colors


Thanks for stopping by, and I will share this post over on Art Journal Journey for Chris's theme all kinds of weather. Fall to me is perfect weather when there is a slight breeze and it rains leaves.
It has been a lovely fall here this year too! What will you do with all of this amazing ink?
ReplyDeletethis can also be warmed back up and used to dye with, I tried working with it like watercolors and enjoyed that too
DeleteThat ink creates a really fabulous color. Much better than the walnut ink I've bought and tried; maybe that is just too processed. You've got a great art product here Kathy. I love your latest page. It is a beautiful fall page and perfect for Chris' challenge. Thanks so much for sharing with us, not just your page at AJJ but also all about your ink. Hugs-Erika
ReplyDeleteThank you so much Erika I appreciate it
DeleteI think there is no color that can compare to that of black walnut. I am going to get my walnuts simmering tomorrow. I love your journal page. Our trees are getting so pretty now. It was nice today, but change is on the horizon.
ReplyDeleteHi Mary-this is exciting! Let us know how it goes with your ink making. I am thinking this can also be reheated and use as a dye, and I liked playing with it on watercolor papers.
Deletewe are getting a bit cooler every day this week, and I just saw rain coming in-sigh I have much to do outdoors yet
I am just so impresed you made ink, Kathy. The color is very vivid and I can't wait to see other things you make with it. Love the leaves and the feeling of movement. Hugz
ReplyDeleteThanks so much I appreciate it very much
DeleteWe have been having some really awesome Fall weather this year too. The Fall page looks lovely.
ReplyDeletethank you Angie, we are having a lovely Fall so far here in Missouri
DeleteYour ink looks great, and loev the beautiful journal page, thanks so much for joining us at AJJ. Have a great week, hugs, Valerie
ReplyDeleteThank you VBalerie
DeleteI love the continuing saga of the black walnut ink. I am so glad you shared how you made it. It sounds like an all day process, but well worth the effort. The ink turned out fantastic. It sure was lovely on your journal page. I was most impressed and of course, I also loved that you shared it with us at art Journal Journey using Chris's theme. But I can't wait to see what else you create with your dye, dear.
ReplyDeleteThank you Elizabeth-yet it is a process a few days for sure from start to end
DeleteIt looks like you now have a good store of ink ready for future use Kathy.
ReplyDeleteI loved the autumn leaf page you created and linked to Art Journal Journey, the colours and weather at this time of the UK for me are lovely as well.
Yvonne xx
Hi Yvonne thank you, we have a really beautiful fall here so far Happy mid week
Deleteyour painting looks amazing... i love diy's alot... nice of you to make an ink from stratch
ReplyDeleteGlowyshoe's blog
thanks so much and for visiting
DeleteGracious Kathy you have been busy. I have wanted to make my own walnut ink for several years and just haven't managed to find the time. Love the idea of doing it outdoors. That way the mess can be easily cleaned up. Your drawings are gorgeous and so meaningful using your own ink. Thanks for sharing the directions and tips. Now I will know where to come when I want to tackle this project. Have a lovely day. Hugs
ReplyDeleteYes the odor from simmering would be too much in the house. Thinking the Weber set up was perfect-I could just keep adding charcoal which was about every hour enjoy your day-hugs
DeleteI love your handmade ink, Kathy. And it looks great on your beautiful page.
ReplyDeleteAs for the fall colors on the lake, they are really gorgeous. Hugs, my friend.
Hi Mia, thanks much it was a fun project. and yes we are enjoying a gorgeous fall this yar-hugs back
DeleteThat ink making is interesting.
ReplyDeletethanks I have been wanting to make this for awhile-it was fun
DeleteA lovely Autumn page and wonderful photos!
ReplyDeleteLooking forward to seeing what you do with the ink Kathy.
Hugs,
Alison
thank you much Alison
DeleteAmazing how it emerges to many jars of ink. It is perfect. Love the rains leaves and acorns. Beautiful lake with fall color.
ReplyDeleteGood morning-thank you so much
DeleteThe ink turned out beautiful! That is a perfect setup you have to boil it. I liked your post about Veteran's Day too. I also have family that were in the Revolutionary War and the Civil War. My step-Dad served in WW2.
ReplyDeleteThank you Debra, I agree this set up worked out really well for this project. I was working outdoors anyway on the rock project so checked it about every hour to add more coals I started really early in the morning as it took awhile for the water to heat up and then simmered til around 4 in the afternoon-let it sit overnite and next day strained it. I did also soak it all for 24 hours first. If I wasn't pressed for time with the weather change-I would have simmered it down to half again-but I am pleased.
DeleteHappy Veterans Day to your family of veterans-hugs
Your walnuts are really providing you some great opportunities to use them in different ways. Such a lovely colour ink too!
ReplyDeleteThanks for making this page for my theme at AJJ. The colours by the lake are very beautiful. It must be lovely now it is quieter too, hugs, Chrisx
!
Hi Chris, yes we are loving the peace and quiet at the lake now-a beautiful autumn here this year
ReplyDeleteThank you Kathy for explaining to me how you can make black ink from walnuts. By the way a laborious task, but it has an excellent result!
ReplyDeleteI tell you that here we are ending spring, the tourists are about to arrive and the rhythm of the city begins to change. If you want to know my city I leave you the link
https://norma2-siempreesprimavera-norma2.blogspot.com/2011/11/mar-del-plata.html
I am so happy you enjoyed the post about the ink. we live on a lake so tourist season is finally over-happy dance haha I will check out your post thanks
DeleteGood on you for making your walnut ink. Looks like it turned out really nice. Another fun thing to do, get some Dr. Ph Martin 18K Gold ink and drop a little into your walnut ink. It will give a mottled effect and some shine. You can never have too much bling. Have fun on your calligraphic journey!
ReplyDeletethank you so much CJ and thank you for the tip with the gold ink-I appreciate that-agree bling is a good thing-hugs
Delete