Showing posts with label fiber U. Show all posts

Tuesday, July 23, 2019

My Fiber U Saturday With Photos

  I just wasn't able to make it in time for T today, especially to really visit everyone so decided not to link up this week for that reason.

  We are up at the lake house today will sleep over tonight and head back Wednesday afternoon. Hubs has another follow up appointment in Springfield Mo with the cardiac surgeon that heads the team for his heart valve procedure on Thursday morning. Springfield is about a 3 hour drive now from the lake house.
  I had planned on once we got moved in to search out cardiac doctors in Jefferson City area Missouri (an hour away) but nature had it's own plans.
  He is really tiring out super fast now, can hardly do anything at all-so I will be sure to let the surgeon know this in hopes to get him moved up sooner-although I know they have a wait list for this procedure.

  Just a heads up on why I am not on the computer much these days. I do miss all of my art friends especially.

   Since I was going to be getting home late Saturday after classes-and needed to pick up a few groceries too I suggested that Hubs sleep over on Saturday (at lake house)-he said he ended up sleeping allot all weekend before heading home late Sunday.

     I had a really fun day!
I was determined NOT to buy anything as I have a little room already packed full of fiber supplies-I was tempted of course to pick up more alpaca but I was good and walked right by haha  I love spinning alpaca as much as I do bison fibers.

   My first class was a saori weaving inspired class to make a bracelet.  The teacher was a retired art teacher, allot of fun to interact with. She spent time and thought putting together a bag full of fun. A beading loom, little wooden fork to "beat" the woven fibers in, a clasp for the finished bracelet, piece of leather to glue to the back of the bracelet and a piece of a rubbery type material to set our little looms on to so it wouldn't slip on us, plastic needles, and loads of fibers, beads, and old jewelry to choose from. A short printed introduction.
   My only complaint for this class-no guidance or instructions on different types of weaves etc. She did demonstrate a bead idea for weaving in, and showed one tapestry weave on her saori loom-that was it. She had allot of books out on the tables for inspiration.
   This was a 3 hour class, we all knew how to weave already-otherwise that would have been an issue, and no one finished. She told us she would be available on Sunday to help us finish our bracelets. I assumed the printed material she gave us would have included that-nope.  I went online to get ideas but didn't see anything on how she was making this. Didn't feel like driving back on Sunday-we were still near 100 f temperatures that day too. Soooo I just made it up haha.
     I had heard her telling someone on what to do to finish it-but decided to just let the bracelet be what it was to be.
    I ended up not weaving my bracelet long enough-so I just knotted the warp strings as far as I could. Then I got the idea to tie a loop to put a bead through on each side to pull it together-never got around to putting some leather on the back-I may still do that. I wove mine wider than the clasp was. She also had several packs of warp threads to choose from-I chose a thicker thread than most did.
   I am wearing it now as I type this up and I really like it.

My camera was up at the lake house and I decided not to take Hub's camera, he uses it for his business so didn't want to take any chances losing it or something. So I took these photos today at the lake house.

 This is a photo of the bag and the back of the loom, you bring the warp thread from the front in those grooves on top, wrap around that button on back, wind around again and will end up at the other button-keep going til you have the amount of threads you want


 Oh and that metal piece in this photo-fits into the holes in the front of the loom-which will curve the loom and make the warp threads tight-pretty clever-this was designed for beading but the teacher decided perfect for weaving-I think she is right-this was fun to work with.


In the little bag on the right-she also included that little cardboard piece to help with weaving, and she was selling that little plastic heddle that she had made up for this loom. Works like a rigid heddle loom if you are familiar with those-and similiar to that disaster of last year. I bought it as I think I can do more 2 harness type weaves with it on this little loom. 
   That class I took last year was just soooo bad-I met a lady at lunch that brought that up too-and she was the only one in that class that had figured it out.


When I got home I didn't like the thicker textured yarns I was using so took that all out-I had chosen just enough yarns to finish what I was weaving. Those were her beads as well. I went with the more earthy colors.


This would be a prettier bracelet with a smoother finish-you are to knot that first row when you take it off the loom-glue well-dry-then glue on the leather backing-and put the clasp on. I had chosen heavier yarn so don't know if this would have worked out as well-I have larger knots.
     I may add some little beads to all those strings-it is actually fun and comfortable to wear. (reminds me of my hippie days back in the 60's ha ha)

My next class-a four hour class-was with the dye teacher I had last year. She is an amazing instructor; so knowledgeable, organized and so worth the money. She makes use of every minute in her classes.

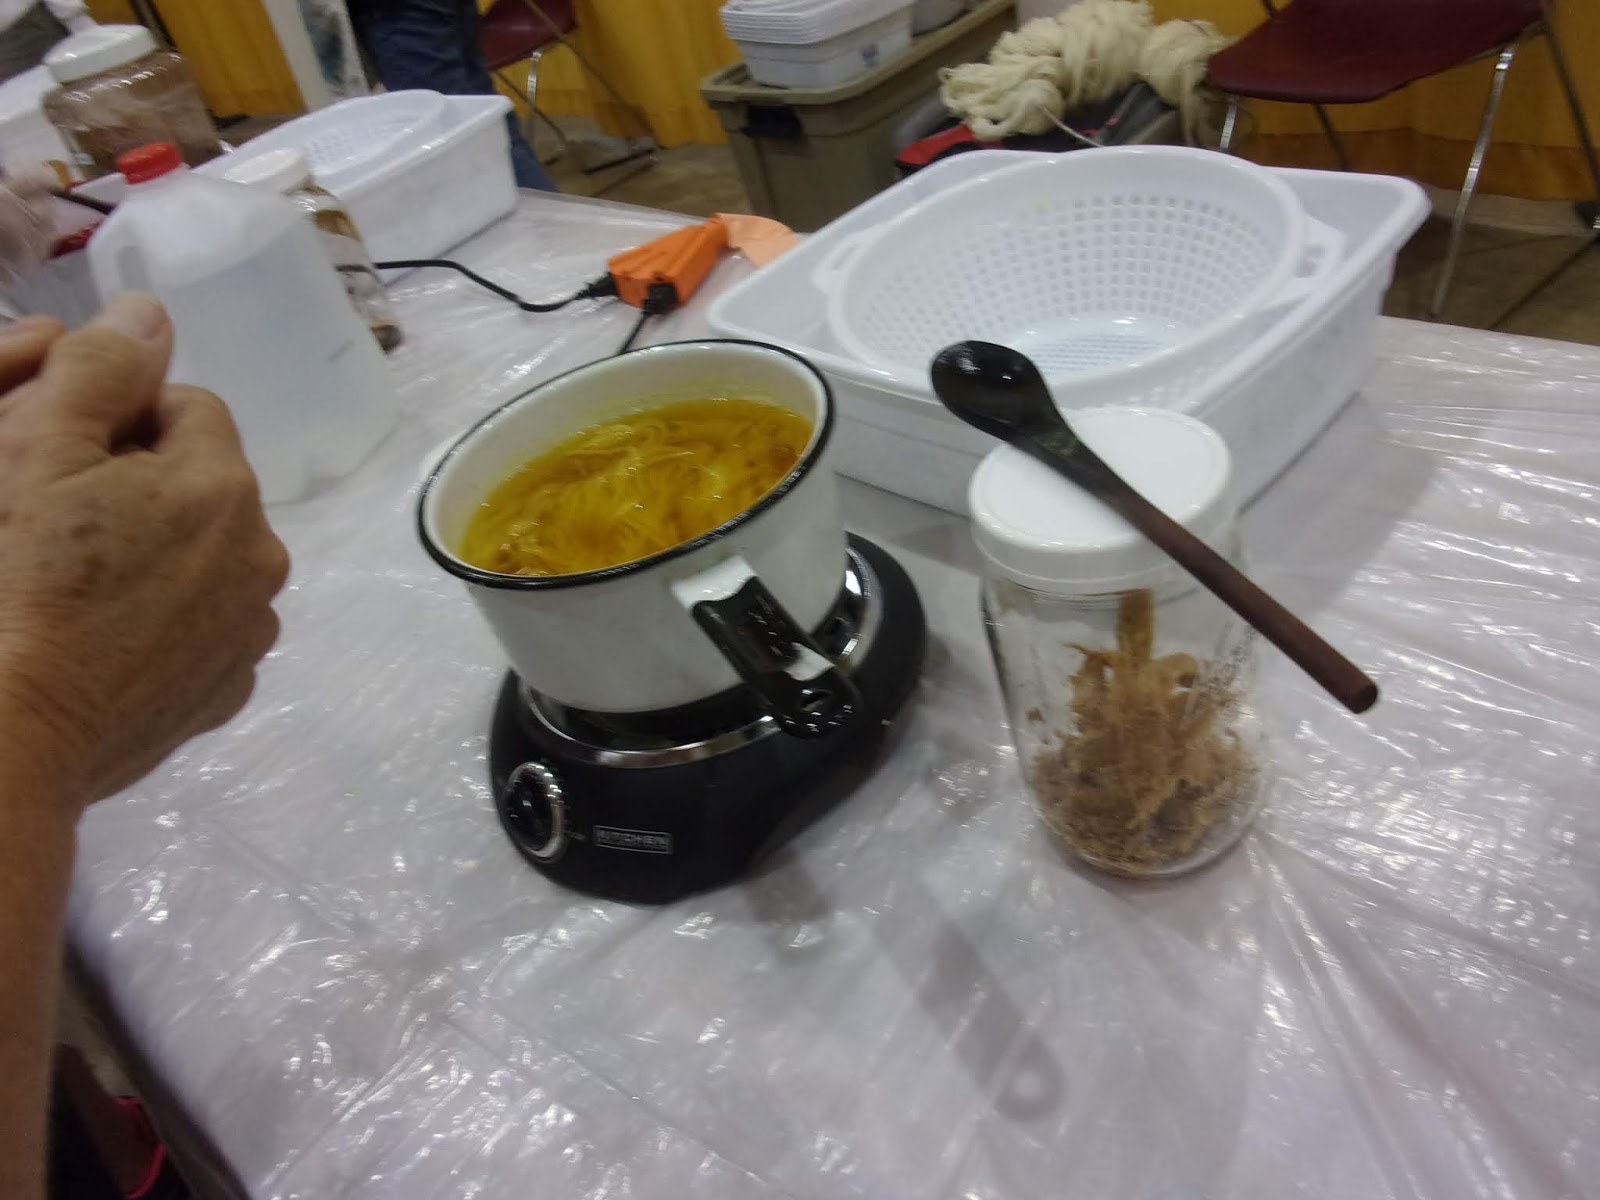
This was an introduction to indigo and weld dyeing.  I have always been a bit intimidated by an indigo dye bath-they sound so complex and a bit scary to me. Not so!!  I will be excited to try this on my own now.

The class was actually a bit large as this was a very hands on dye class, but she managed it all well. I think there were at least 14 of us.

We all had samples to dye, and socks to dye shibori style-that was so fun. The one problem was she said she was ill when she was packing up her car and left one burner in the garage that didn't make it into the car. She lives in Oklahoma a state next to Missouri.
     So that was an issue for controlling the temperature-she had two indigo pots going- one on the burner and one off-so if you were dipping your samples in a too cool pot needed to wait til got exchanged with the one on the burner and warmed back up. also with so many students the dye baths would get exhausted so she would add more dye to the batch-heat it back up-skim-and re dye.

I learned so much though, and this was a very fun class. I had met a husband and wife that took her dye class last year so it was great to meet up with them again.  They drive 6 hours to this event and take classes both Saturday and Sunday.

She also had set up little samples of wool-cotton-linen-silk so we could see the difference in fibers for the dye take up. Wool and silk are the best for indigo.

We also did a woad pot and we had the four little fabric samples-and we could choose to dye our socks either in indigo or woad.  The woad is a plant material one can grow but it is very very invasive-and I was not impressed with the color-I got prettier colors with my ice and fresh indigo leaves than the woad.

It was just as well that I didn't have my camera-we were wearing gloves the whole time and really not much time for photos during class.

This is all of the dyed pieces  (sorry that green lower left corner is an applique in a  table cloth)

all photos will enlarge to full size-just click on them:


 The idea for these samples-all were on a brass safety pin-(brass does not rust-I need some of these lol) we dipped for about a minute-pulled out-waited 10 minutes-took one skein off and dipped again-repeat-I am happy with the colors-but they did not turn out as they should-the second and third skein were dipped in too cool of a dye bath-and the timing was off on these samples too-but I learned how to do it and loved working the indigo dye pot
  One needs to remember not to add more oxygen to the dye pot-don't let dyed material coming out of the bath-drip into the pot or squeeze-a big NO NO as it adds oxygen back in to the dye pot. Many of us got reminded of this.


I was playing like our Elizabeth would have-these strings were used to tie our socks for the shibori look-instead of throwing away I saved mine and my two friends threads-I should have collected the rest that were tossed. This was heavy button hole thread  The real light ones were from woad


wool left-top linen-then silk-bottom cotton


top left wool-then silk-below cotton-bottom left linen


Aren't these socks just way too fun!! I love them. She got them from Dharma trading where she found the highest % of cotton for better dye results  She had these large plastic drainage poles that she cut to size-we tied on a sock on each end of the tube-scrunched the socks down as much as we wanted-dyed.


Everything needs to sit a few days or more-and then rinse with a vinegar-water solution til clear.

I asked the dye teacher if she would be back next year-she plans on it.

We haven't brought up our commercial coffee pot yet-as we are still living in both places still. I have other ways to make coffee though-french press, pour over, vintage percolator.  I love my pour over.  We had friends stay over and they were all quite impressed-the flavor of the coffee is exceptional too


Til next time.

UPDATE: I snagged some photos from class-that was posted on the fiber U group on facebook first one is me-I took everything out except for the center and started over-I just messaged the teacher too and she gave me the instructions for how she finished the bracelets with leather back and clasp
  PS I never show myself online so this may be the last haha


Just found another photo me on the left in blue shirt I lost 4 more pounds so my jeans are finally a bit baggy-yay


Sunday, July 22, 2018

T Stands for Tuesday & Fiber U Loaded with Photos-Long

Happy T Stands for Tuesday!
  This is where we share a drink related post-just show a photo of your water bottle or what ever you are drinking. Join us with our hostess Bleubeard and Elizabeth-link in my right hand column.

  My weekend was full of classes at Fiber U this year. I took two classes on Saturday and an all day class 8-3 on Sunday.
  I was determined not to shop this year, except perhaps for some natural dyes-which I did end up bringing home a couple hard to find dyes-but nothing else-so I was good-no spontaneous purchasing which I love to do with fibers and beautiful handmade tools-but I did not even look at them. Actually there was time to shop-a good thing ha ha

      (Note: I set up links to explain weaving and spinning terminology)

  My first class was using a blending board to make rolags for spinning. 
   You may remember last year I shared a few posts and photos about me making rolags with my blending board.
  I decided to take this class for a hands on experience as I was having a little trouble getting my rolags off the board-and this turned out to be a very fun class where the time really flew by fast. She had one full table packed with all sorts of fibers to try-including fibers made from milk, banana, mint, soy, all sorts of things. I had also tried making roving from a you tube video, so I brought along my ditz. This was the teacher's first time making roving this way-but I learned tips how to do this better as well.

I remembered to bring my camera along this weekend too-all photos will enlarge to full size just click on them


This event was held at the local civic center in my nearby city


Sorry this was a bit blurry but the only photo I took of the table of fibers-and much of the table is not showing here


The class was worth taking for me to learn of this technique-using a brush to push down some of the more difficult fibers-and then using the carder afterwards


This was my blending board-and you can see my bottle of coconut water to back left


The finished rolags-ready for spinning at end of class


After lunch, my next class was Dyeing with Woods, the class I looked forward to the most and did not disappoint.

  The teacher was a biologist, a bit of a chemist, and a natural dye historian. She has taught in colleges and universities, and at many events like this one.  She was extremely organized and could answer any question we asked. I learned so much. I had discovered some things on my own and when she mentioned a couple it let me know my thinking was correct.
   I was upset that my pokeberry dye on rug yarn that I did several years ago had lost it's color after 4 years and stored away. She reassured me it's a berry so in the end is a stain not a dye, and I had concluded that as well but wasn't sure.
  Another thing I had never read about was to add a wetting agent to the skeins of wool. I knew they needed to either come right out of the mordant bath or to soak over night so the fibers are very wet and will open up to accept the dye. The teacher adds a couple drops of pure no scented ivory dish soap.

Here are a few photos-there were 4 of these pots going at one time, and we filled them three times plus one more. We each ended up with 13 samples, a booklet of information, a ring and tags for our samples.


These bags are filled with our samples of each of the 13 different wood extracted dye pots we did


Below are close ups of some of the bags with our samples-we got purple, browns, yellows, red, a black and one was grey-green

Logwood
   I had bought some of this a couple years ago from her booth-not knowing at the time she also taught. She says now the wood chips are very very difficult to find so one needs to buy the extract right now  I am glad I waited as I now know how to dye with it 


Brazilwood-gorgeous  I bought some of this to dye with


I was very impressed with this gorgeous yellow from the black oak-but you use only a very very small layer just inside the bark-so this is more expensive and harder to find. I bought a small bag She says it will give gorgeous greens over dyed with indigo.


Depending on the wood-some of these are soaked in a water solution, but most in an alcohol solution for a week or more to extract the dye.

She also added the mordant right to the dye pot which I have not done before-I have always mordanted the fibers first and then dyed. this was definately easier especially for yarns

Sunday was my all day Scandinavian weaving class.

   This class did not go well for me at all. I was tired to begin with and then the instructions were very unclear. I felt pretty stupid as I know how to thread a 4 harness floor loom.  geesh 

   The instructor was very knowledgeable, a weaving historian and also a reenacter  She went to allot of work setting up our kits with everything we needed, but she was very poor in explaining things and she mentioned in conversation she was in her mid 80s-so I do applaud her for still teaching--but
    The lighting was also bad in the room and very difficult to see white on white.  There was one student that was worse than me-she said she was a weaver too but did not take the threads off the cross properly so she really messed things up and the teacher gave her another warp-which she also messed up.
    I managed to finally get it threaded properly with an hour left in the class. I just asked the teacher to show me how to set the end up for weaving and I would figure it all out later--probably Not though ha ha
   This is similar to a back strap loom where you tie the warp on to something stable and then you tie the other end to your waist-and then weave. This little loom has a shed though like a floor loom or rigid heddle loom, I took a few photos of the student's set ups


There was only one student that was weaving right away-she ended up with allot more than this finished. She was nice and offered for me to weave on hers so I would know what it was like-as she was going to take most of it apart and weave over again with better tension and edges-I said thanks but I think I am brain dead right now-5 hours to thread mine several times ugh Well in the 5 hours I was also looking at samples, and listening to the teacher about different things


In the 1700 and 1800's these little looms were beautifully handmade and carved
 This is a modern one that was laser cut


She had several samples woven up


This is mine finally threaded-these are plastic they have long slits-tiny holes-and half long slits to thread into. 


      I also wanted to share my swap-I got Elizabeth's big envelope in the mail on Saturday. (Mine will get mailed out on Monday)
   She sent the atc, handmade paper, and butcher papers-oops it was deli papers- for me to see-for eco dyeing and other crafts Thanks again


I decided I needed a bit of wine this evening-lol


Happy T Stands for Tuesday

Monday, July 16, 2018

T Stands for Tuesday & T's 5th Birthday Celebration

  Happy Tuesday everyone.

       Tuesdays are where we share a drink related post-only requirement is to show a photo of your beverage.
   This Tuesday is special as we are celebrating T Stands for Tuesday's 5th year with our hostess Bleubeard and Elizabeth. Thanks so much for hosting Elizabeth, as it has brought me  back to my blog and meeting new artist friends.
  I find it more difficult to find people that want to blog still so I really really appreciate and love everyone in the T Group

  To celebrate I have made us frozen fruit-yogurt popsicles 
In my blender I added a large container of vanilla yogurt and added lots of different frozen fruits-peaches, grapes, cherries, strawberries, mango, pineapple and whirled it all up til smooth. Yum really hits the spot for a treat during these continued hot humid days.


 I have been busy since last Tuesday. I had a few days of eco printing onto papers. If you missed my posts and care to view them:  this one is the summary of two different sets  After dried was quite pleased with the results.  I also did a day printing onto my own handmade papers-that was a so so success. I am thinking the tannin added to the alum acetate mordant for the handmade papers especially is too much in this case, and also the iron water is too strong as well. I will be rethinking that process. That post is here

It took me a couple days to remember what I had been thinking for the hand quilting on my own baby quilt (top made for me by my Great Aunt back in 1949) that I shared last week. I realized I needed to get back to the main center piece and get that quilted. I started marking lines the width of a yard stick and decided nope don't like that. I need to go back to the smaller width like I am doing for the embroidered small blocks. I get ready to start marking and see where I had left off doing just that ha ha.  So I am in the groove now.

Note: all of my photos in this post will enlarge to full size just click on them


When finished with this section, I will need to take off the frame and turn this quilt around to sew lines the other direction-but I will decide when I get to that but I think I will make wider sections.

I promised myself that I would start back on the hallway project this past weekend-and I did that on Sunday. It is a difficult section to work on as the light is really bad and I am working white on white. I am dreading the ceiling and wish I would have gotten to that last year-oh well-I will get this done.

Getting things set up to work and you can see next to the wall on the left is my beverage reference-my hot chicory drink in this cool little thermos type bottle.


This pillow I use to sit on the floor with-and those bags are filled with the tissue paper for this project. on the left is small scraps-I tear the sides so no straight edges- and the bag on the right is the tissue paper rolled into balls to crinkle it up for textures. I tear those in quarters


Sunday I got most of this lower wall done-sitting on the floor and working as far as I could reach


a close up of the texture-I use wallpaper paste to put it on


This is actually a fun DIY project-just not the ceiling any more  ha ha

  This comings Saturday and Sunday I will be taking three different classes at Fiber U This is a yearly event and my third year taking classes.
   This will be my first ever natural dye class as I am self taught from books and reading online. This is a 4 hour class here is the class description 


Dyes from Woods
(Beginner)

In this class, we will be exploring the various types of dyes, both native and historical, which can be derived from the woody parts of plants (including roots, heartwood, and bark).  Most of these dyes are considered to be light and color fast.  Many of them have fascinating histories.  Each student will leave with a notebook of samples
I also will be taking Rolags with Blending boards
class description:  

Rolags with Blending Boards
(Beginner)

This is a class for those who want to take rolags to a whole new level!  Make awe-inspiring rolags on the blending board using fabulous fibers like silk, bamboo, alpaca, corriedale, merino, mohair, firestar, tencel, Angelina, and newer fibers like mint, rose, mil,, banana and pearl.  This class teaches a wonderful, easy way to create beautiful, colorful rolags for spinning.  No previous experience necessary.  Bring your own blending board or let the instructor know if you need one.
    I probably don't need this class but wanted to fill the day with another class-and I want to see hands on how she is doing this.

Sunday is a 6 hour class 

Scandinavian Band Weaving – FULL
(Adv. Beginner)

The double slotted reed is similar to a regular rigid heddle but has an extra set of slots that are designed to carry the pattern warp separate from the background threads.  As you raise or lower the reed for each shed the pattern threads remain separate in the center of the shed making them easier to pick up or drop.  The background warp weaves a plain weave and the pattern threads float on top of the warp threads, a variation of pick up only much easier since the pattern threads are separated.  The original hand carved double slot looms go back to the early and mid 1800’s.  Although originally Scandinavian, you can create and weave any design you choose plus it is so portable.  Traditionally woven bands or ribbons were used as closures or in any place where a tie was required, for securing bundles for easy carrying, as closures or binding such as a babies bunting keeping him snug and warm to trimming costumes adding color accents to clothing and much more.  All materials are included as well as the double slotted heddle and shuttle which are yours to keep.  Weaving experience not required, but helpful.  Note: This is a 6 hour class with a break for lunch
I was looking for a photo and got all kinds of looms-but I think it will be something like this found photo online
Sami 2 slot weaving reed
   I have been curious how these beautiful hand looms work-I will be so busy busy taking classes over the weekend no time to shop-a good thing!! lol as my craft room is full to the brim. smiles

   I did make a couple atc's but I did not know that over time rubber cement goes bad-it refused to dry. I had made two of them for swapping but my favorite one I had to toss.  My second one I do like too though


Happy Birthday T Stands for Tuesday