Tuesday is where we gather together with a drink related post and join with our hostess Bleubeard and Elizabeth-find the link in my right hand column.
A few days ago I shared a post about being inspired by my friend Barbara to make paper from dried weeds. Hubs thinks what I collected around our pond is canary grass. (note: if you have not already met Barbara she is an amazing artist)
After doing some things outdoors in the gardens I decided it was time to make paper this morning (Monday). The weeds I had collected had been soaking for a few days (I did drain and add fresh water each day), as I worked out in the butterfly garden all weekend. My body needed a break from that today so decided to make paper.
I decided to go with Barbara's recipe and use 1 tablespoon of washing soda per 1 quart of water. (many recipes go by the weight of the fiber-I think this recipe is better, and the washing soda is less expensive than my soda ash (used in natural dyeing) that I switched to this also)
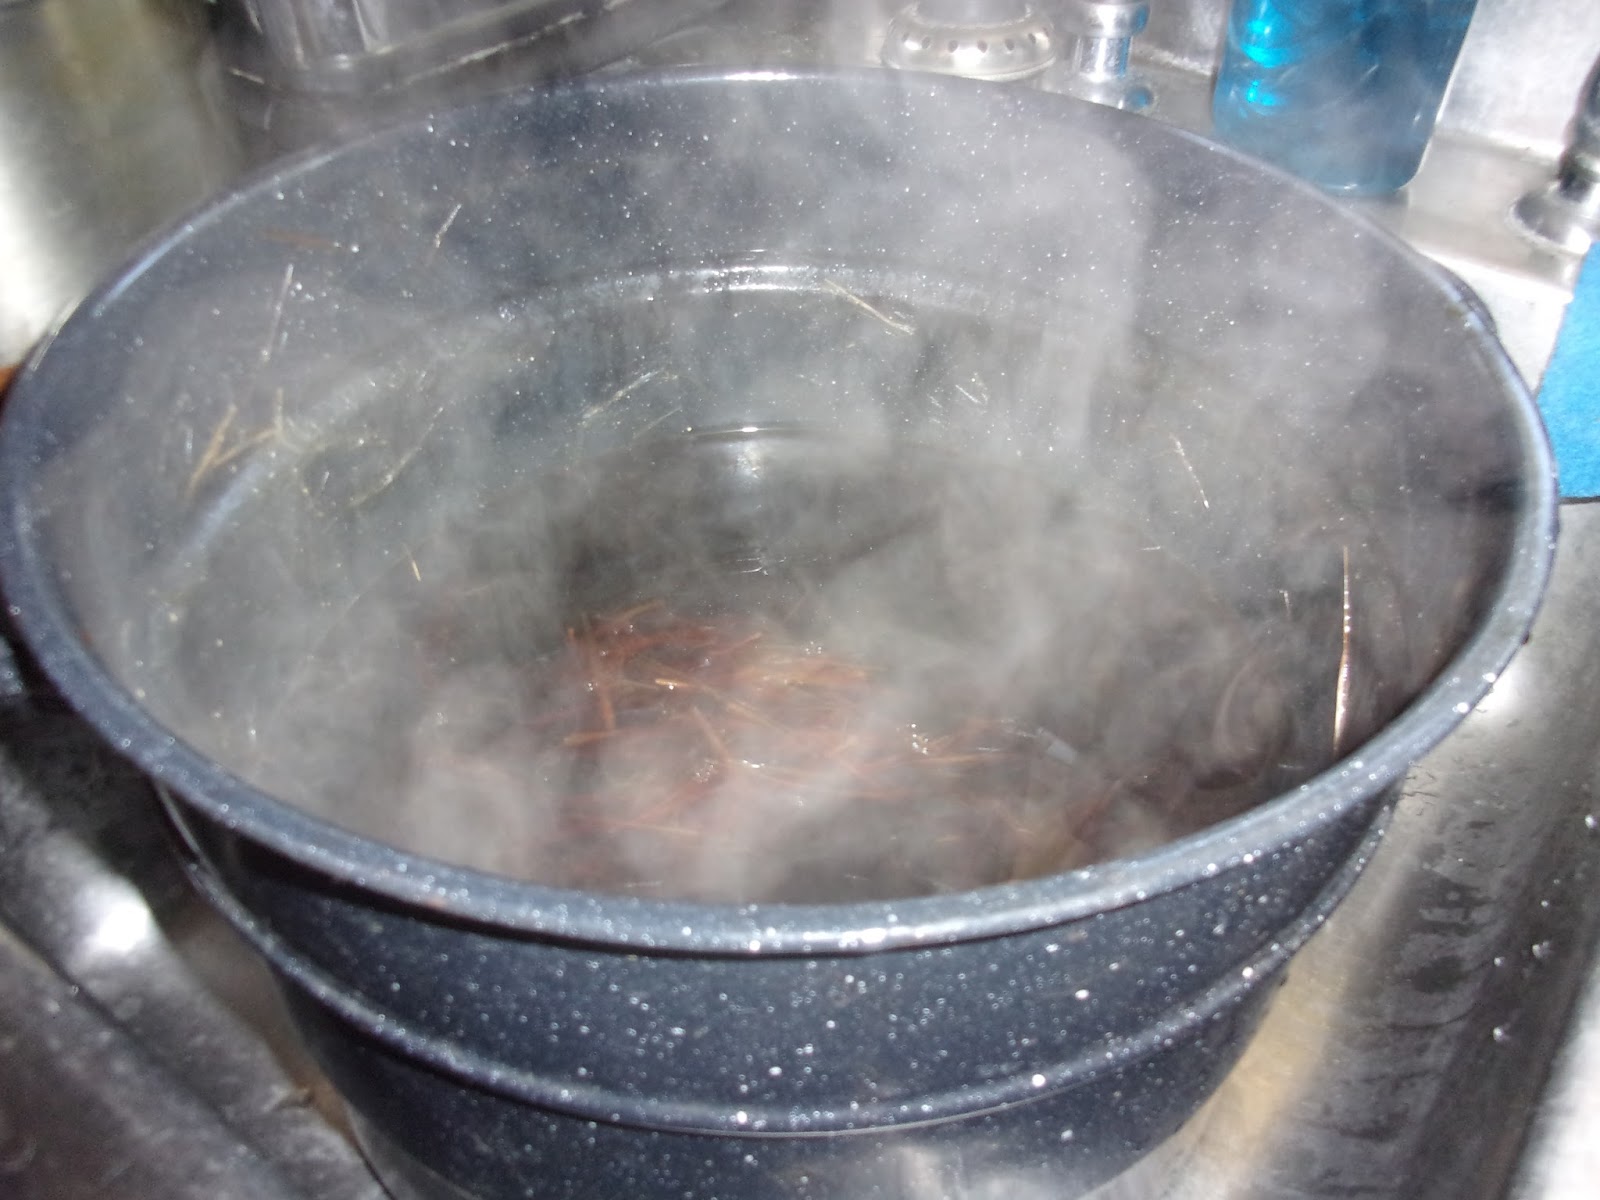
I added enough water to have a few inches of water above the weeds-plenty of water to move around in. I let it all simmer for about 3 hours. I am glad I stopped when I did or the pulp would have been too mushy-slimy. I think this is a part of the paper making process when using natural materials to keep an eye on things as it simmers to make sure the pulp does not get over cooked.
My batch of dried weeds had lots of stems that will not break down with this method. The grass I used had stems that went up through the entire plant. I decided not to worry about that and let it get whirled up in the blender.


This is the pot after simmering and I am straining it into a colander.

You need to rinse the fibers well to get rid of the washing soda
Below is how it looks after rinsed-you can see that the broken down fibers will be the pulp for paper making-the rest is all those stems-I left them in for textures


At this point I was going to take my colander and pot of very hot liquid outdoors and strain the rest of the fibers out. Then I noticed what a gorgeous brown color I had. Wow another natural dye?? So I grabbed another big pot and strained it into that. (Note all of my pots, strainers, cups, measuring spoons etc are all designated craft supplies-never for food cooking)
I got to thinking I don't have anything pre mordanted, but then I remembered I had a couple silk scarves I purchased from Dharma Trading to dye with. So I mixed up some alum (mordant-fixative) in a little water added that to this left over water and added a silk scarf.
Surprise!!

This is the color after just about 15 minutes soaking in the "dye" bath This liquid was still pretty hot-but cool enough for silk-I had discovered that to dye naturally with silk it will not tolerate allot of boiling liquids. I am going to let this sit in the bath til later tonight or maybe even til tomorrow morning. Then I will rinse it in cool water and let it dry-and see how dark it will remain. This was a much stronger dye than a coffee or a tea dye so am excited about it.
On to the paper making.
I have a very simple paper making kit I bought from Grummer's. This one is the perfect size for me and very simple-I love it. I can dip it into the pulp or hold it and pour over it-I did both methods with this project.
My first two papers I poured over but they were too thick-too much pulp in them. So, I tried some by dipping but was more difficult with this particular pulp so I switched back to pouring over but instead of from the blender I took a small cup and poured over slowly.
Here are the photos-I start with filling the blender (also designated only for crafts) half full of water then add a big handful or more of the pulp whirl it up good pour into my pan. For dipping my mold into this I need about 3 blender fulls. Like I had mentioned this paper was easier to pour over the mold. As I blended more pulp I used the water in the pan to fill up the blender half full each time instead of fresh water. You use a sponge through the screen or the plastic sheet to remove allot of the water from the paper. When doing these natural fibers like the corn husk paper as well, I keep the papers more wet-was easier for me to take them off the sheet for drying.
From Grummer I also bought a pack of sheets, the size of my papers to absorb more of the water-these are really nice and I need to buy me another pack.


There is a fine screen under this paper


This photo is holding the mold in my left hand and pouring the pulp over it from a small cup

I use a very heavy and thick dictionary covered in plastic bags to weight down the papers after they come out of the mold

Then I set them out on those absorbing papers to dry-I will need to change up the absorbing papers or place them on the towel once mostly dry
I was very pleased I ended up with 9 papers. My back was telling me to stop ha ha but I finished just in time at 1:30 pm to make us our meal.
You can see all those stems had gotten broken up smaller in the blender

When I drained off the liquid from the pan I had just a little glob of pulp left. So I just hand formed it. Might use it for a harvest moon in my journal pages

Next up I am going to have to try making papers from fresh greens outdoors-grasses, baby leaves etc-more fun in the kitchen ha ha
Since this post was quite long I will share my butterfly garden project in a seperate post.
The drink I am sharing this week is a mule. I hadn't had one since last year. Actually I had never heard of a mule before until the recipe came with the bottle of huckleberry vodka I had bought last year on my trip to Yellowstone Park. The mule has been around for a long time just came back around I guess.
I fill the glass with ice, add a shot of vodka-this one Tito's is gluten free, a good splash of lime juice and then fill it up with ginger beer. I like this brand but I buy the diet to save from drinking all of that sugar. and this is called ginger beer but it is not beer at all-just a soda. I you love ginger you will love this. (my glass looks empty but there is a little bit left on the bottom lol)

Happy T Day everyone!
Update: It is about 6 pm here now and the dye bath is cold-so I dumped it out and rinsed the silk scarf and then added a fabric softener (for hand dyed) I love the color-very soft, it will be a bit lighter once dried. it is almost a soft yellow instead of a brown


Oh, wow! Kathy, so many thoughts to reply, but the first important thought is that your kind words and link to my blog were so sweet of you! Thank you, I’m sure I’ll make some new friends.
ReplyDeleteNow about your paper, it is totally awesome! Isn’t it fulfilling to make paper of the way ancient people made it?
I agree that closely watching natural materials as they simmer is very important. They can turn to mush in a heartbeat which it’s very difficult to rinse, and in the end probably not get enough paper to make the effort worthwhile. About dried weeds that have stems resistant to breaking down, I found it helps to cut the weeds into smaller pieces before cooking them. They still don’t break down much, but they will be smaller. However, I’m like you, I like to have texture in the paper. I am glad you included something about dipping the mold vs pouring into the mold. I was going to try both tomorrow, now I think I’ll just pour. I feel using dried materials is a totally different experience than using fresh. Be ready for that when you collect live grasses and weeds. They break down in cooking almost immediately. I also have the sheets you mention for drying new paper. From what you wrote I couldn’t tell if you know that they are reusable after air drying them. I have the same ones that came with my kit years ago. They are a bit discolored but intact and they always absorb water from the new paper. I was interested to read about filling the blender half-full with water, then adding a handful of plant material before blending. I didn’t have a handle on the amount of water to plant material that should go into the blender. Now I do, thanks! Your papers are absolutely gorgeous, and as we both go forward, it will be fun to compare notes and see if we can somehow add different colors.
Speaking of color, the bonus you had today after dying the silk in the water left over from simmering your plant materials was a stroke of genius! That water is very dark, it just has to give you a lasting color!
PS...thanks for the fabulous photos!
ReplyDeletewow- such an interesting post! Thank you for sharing your process with the dying and paper making. I love how organic and natural it all is but I just don't have that kind of patience to do it;)
ReplyDeleteThanks for sharing, and happy T day!
I love the color. Like butter.
ReplyDeleteI am super impressed with your paper making and I now know I cooked my day lilies too long when I made that type of paper. On thing, whatever pulp I'm using (mostly I use paper), I begin with a blender 3/4 full of water, then slowly add bits of paper pulp. I do this because I don't want to burn up my blender motor.
ReplyDeleteI think your silk scarf came out great. Light, but sets you up for overdyeing if you chose, too. You accomplished a LOT this week, while all I did was work in my gardens.
I have never heard of a mule, but since I'm not an alcohol drinker (just never cared for the taste, but I'm definitely not a prude), I can understand why.
Thanks for sharing your paper making process, your dyeing, and your mule with us for T this Tuesday. BTW, I made my own moulds, but I like the looks of yours.
How fascinating to read about your paper making, and the colour of the dye was surprising, too. Happy T Day, Valerie
ReplyDeleteI can tell you had a fun day dyeing. The results look very cool. I can't wait to see what the dried scarf looks like and the how the paper comes out. I've heard of a mule but didn't know what one was. I think the huckleberry vodka sounds nice. I should see if I can find any as I would enjoy that. Have a great T day Kathy. Hugs-Erika
ReplyDeleteWow, what a facinating post! I loved following along to see how you made the paper and what a beautiful colour your silk is 😁. It was so clever of you to think to use the water for dying it too. Thanks for sharing and wishing you a very Happy T Day! J 😊 x
ReplyDeleteI enjoyed your beautiful photos about paper making!
ReplyDeleteHappy T Day!
Rike x
You are so amazing. I'm always in awe of the things you make.
ReplyDeleteSpeaking of natural dyes, I wanked into my office yesterday and noticed a pool of a gorgeous purple dye on my desk. It was also dripping down my printer. The source was a flower (gladiola I think, but I'm not sure) that had withered over the weekend. I thought of you and wondered if you knew of it and used it.
Great tutorial on how you did your natural fiber prep. Love the soft color the dye made!
ReplyDeleteI've made paper from pulp but not from plant fibers. It was very interesting to watch you process. The color of the silk scarf is very pretty. Not at all the color I thought it would turn out.
ReplyDeletei loved to see the dyeing process as well as the paper making. though i think i will not do the latter myself... i also think the Color of the scarf is wonderful!
ReplyDeletehappy t-day!
How interesting to learn about paper making with weeds and grasses. Fascinating! Thank you for showing us.
ReplyDeleteYour scarf turned out beautifully! Wow! Such abeautiful colour! Well done you.
Happy T-Day,
Lisca
Fascinating! I made paper once, but I used paper pulp (which misses part of the point, I think lol). I love yours! I love that you got such great color from the liquid that would otherwise have been discarded. I'll look forward to your gardening post :) Happy T Tuesday!
ReplyDeleteKathy just loved seeing the process in pictures! Thank you so much.. And as usual i'm tuckered out after visiting your blog.. lol I look forward to seeing what you do with this paper.. :) Happy T day ! Hugs! deb
ReplyDeleteA super post to read about the paper making and great photos as well.
ReplyDeleteHappy T day wishes.
Yvonne xx
Beautiful handmade paper. I love how you documented the process so we could see it. I would love to try this sometime but I don't think I have time at the moment for any new hobbies. I would love to see more of your experiments with this process.
ReplyDeleteHappy Tea Day,
Kate
WOW-- those paper is unique! Thank you for sharing the progress.
ReplyDeleteI am in awe of your creativity! I will never find time to make my own paper I fear!
So I love to see yours!
Hugs, Susi
Fascinating process, Kathy! I learned a new word today - mordant = dye fixative. You're a veritable font of knowledge ;-) The paper looks great. I like the texture the stems added. That's a mark of hand made paper to me.
ReplyDeleteI didn't know there was gluten in vodka! Makes sense - made from grain. Gluten is just everywhere, isn't it? I don't know how you (or my poor sister with severe celiac) manage.
Happy T-day! Hugs, Eileen