I am very excited about my dye results on cottons.
Last year when I was going to the resale shops more often I searched on the sale racks for cotton tops-blouses-in hopes to dye them and or eco print them and then post in my Etsy shop. I picked up mostly smaller sizes hoping to attract some younger people. Going through them this week I found two large pieces-one long sleeve knitted cotton, and a pretty cotton blouse.
I enjoy the surprises achieved with natural dyeing.
Last Saturday I grabbed a big paper bag and my scissors and collected ripe goldenrod flowers, they were at their prime and more of them this time- I collected enough to fill a water bath canner 3/4's full of the flowers. We had been predicted to get rain over the weekend so I wanted to gather before then.
Today, was my day to set up the dye pot.
It is always good to scour your wool or other fibers first to rid them of any oils etc, especially cottons and most especially pre made articles of clothing.
Most cottons if I am dyeing with muslin or quilt fabric I can usually just use synthrapol in a hot wash, but I have found from past cotton natural dyeing that after the synthrapol I also use the scour wash from Earth Hues and follow their instructions. Especially for clothing articles I do this extra step when natural dyeing.
To dye cotton:
I go through the scour process, then I set up the mordant (fixative) process used for cellulose fiber alum acetate which I have only found at Earth Hues so far, and when you purchase just ask for their print out of information. I have no affiliation with Earth Hues I just learned about them several years ago from other online dyers-and they are really helpful with answering your questions too.
Most resources just sell alum but there is an alum for wool and protein fibers and another alum for cellulose fibers.
As with my wool dyeing when I have the mordant bath set up, then I start heating up my dye bath. I covered the goldenrod with water with a bit above it-heat up slowly and don't let it go to a boil. At least in my experiences dyeing with goldenrod for several years now I get a clearer yellow with this process. This takes just about the same amount of time as the mordant process.
When the time is up on the mordant bath I used a designated spoon for dyeing and took out the blouses and placed into a designated dye colander in the sink. Squeeze to drain. Again as in wool some instructions say to rinse and some do not-I decided not to.
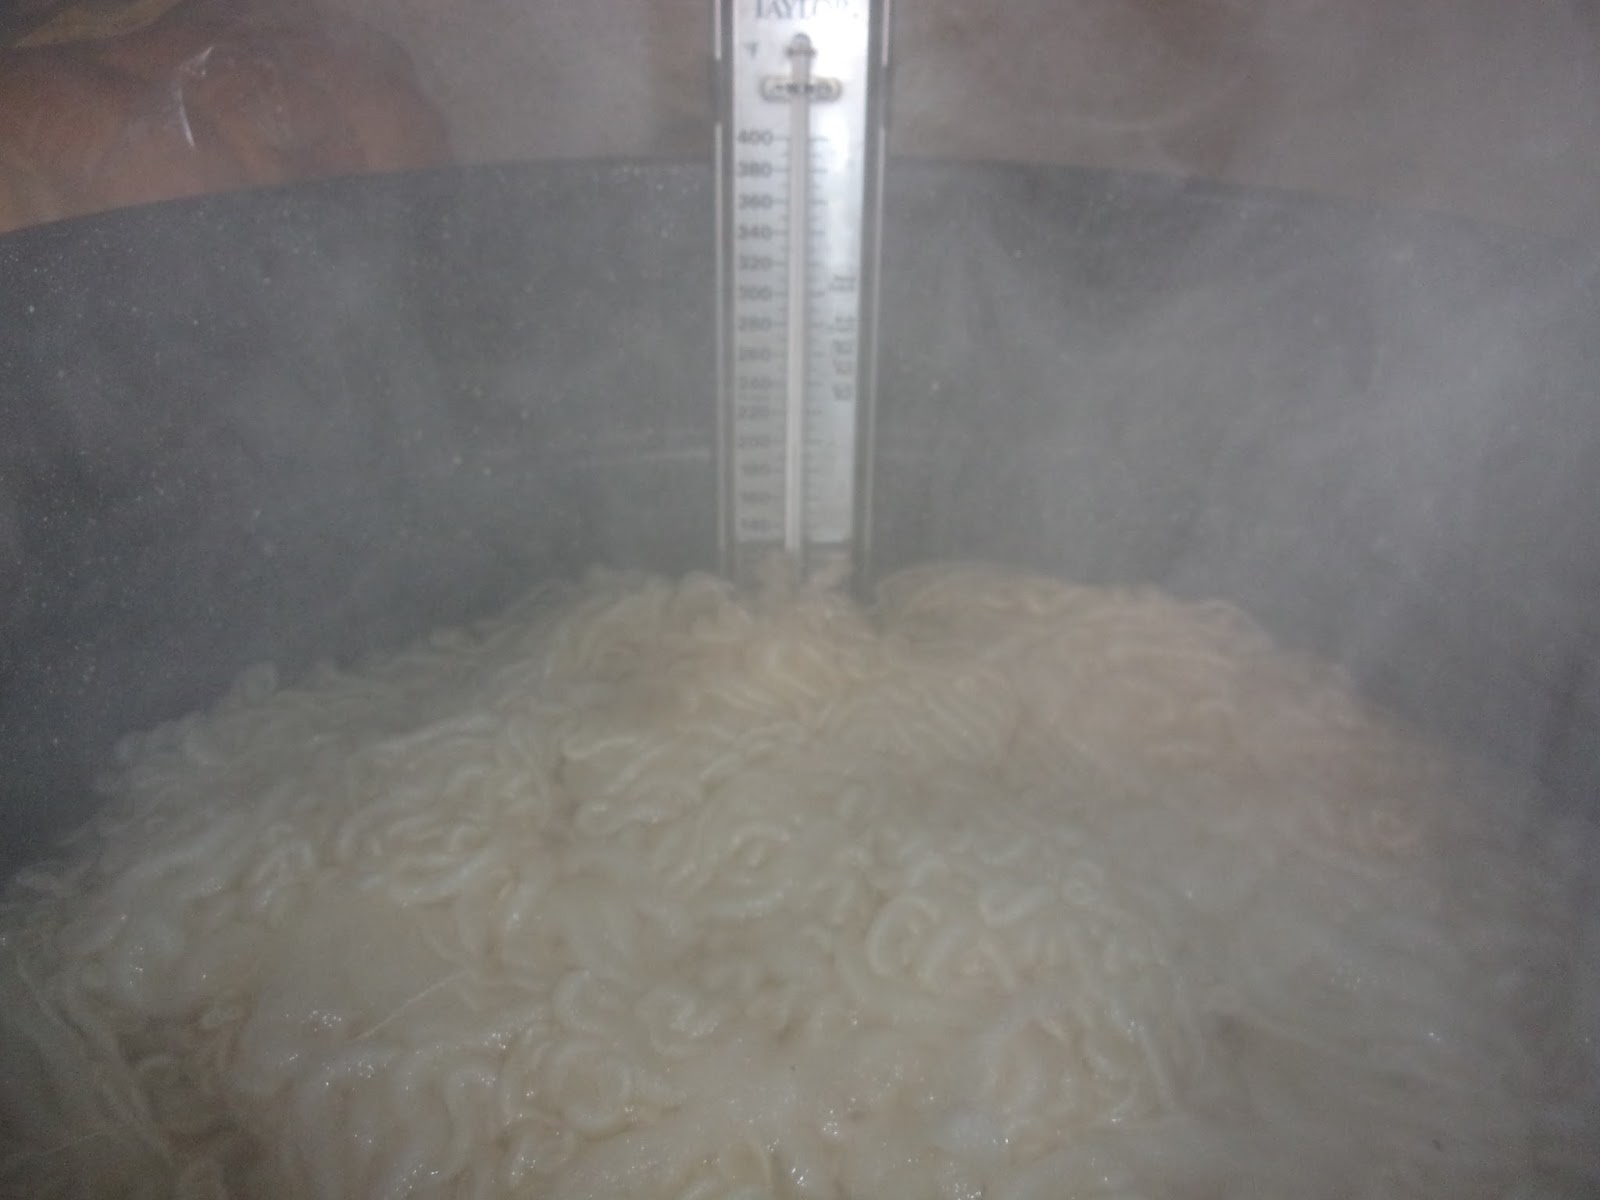
For the dye pot strain out the goldenrod flowers. It is too hard for me to handle these big heavy pots now so I have a spoon that I just scoop out all the plant material. I get all of the big stuff but not all of the finer pieces.
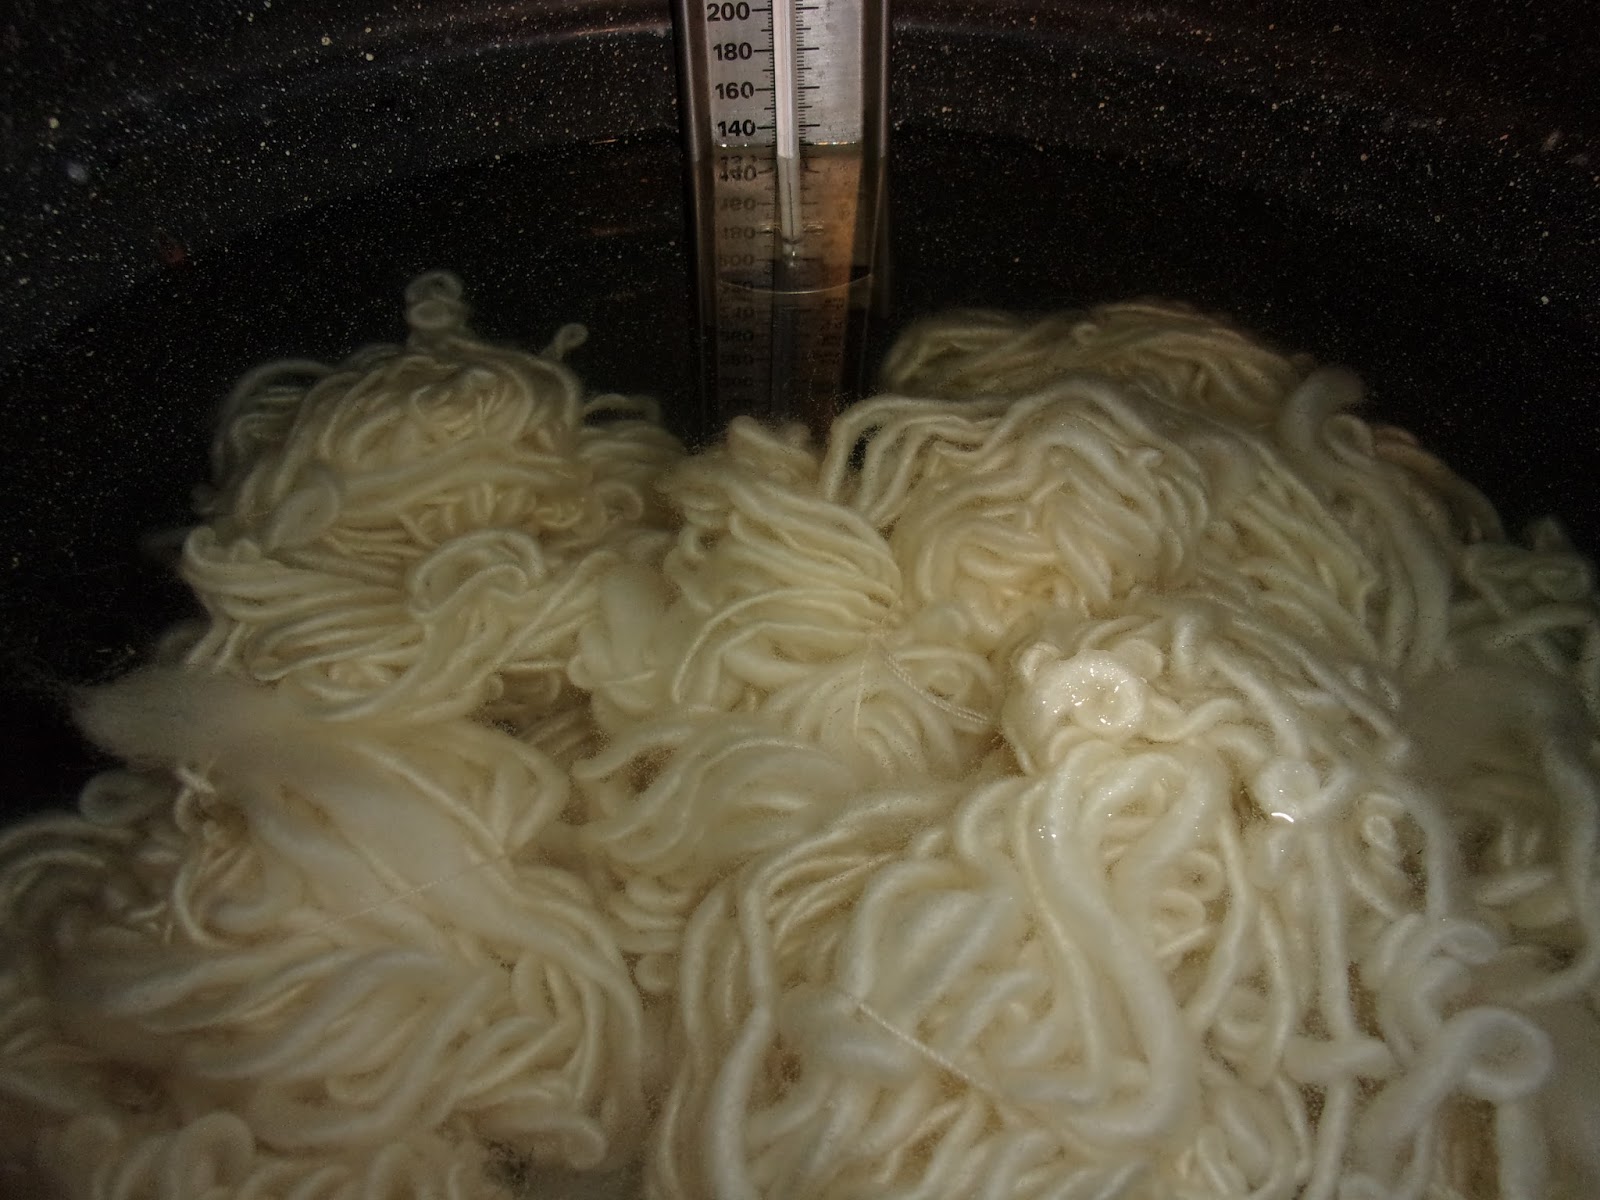
I then placed the cotton blouse in first and kept an eye on til I loved the color and then removed it.
I then added in the tannish-pink knitted cotton shirt and added that to the dye pot-since it looked like there was lots of dye color left.
and wow-happy happy dancin with the results. I squeezed out the blouses-not twist-and laid them out on thick towels to dry-I will change those up til they are dry. and like the wool dye project-I won't rinse these out for around 5 days.
Here are some photos-just click to enlarge
I was really surprised with the pretty color achieved going over a tan-pinkish color knit cotton top. Now to wait and see how they dry and rinse out.
I had read a bit about natural dye extracts on other posts but have not tried it-but that's next. These are all natural dye plant material dye stuffs that are either in liquid form or a powdered form. Earth Hues carries several-some are pretty pricey some not-but they do dye allot of materials. On my last order I decided to buy one that will give reds. One also needs to pick up the calcium carbonate for reds. That one I need to plan ahead as reading the instructions you mix it with water and let it sit overnite before using. I may just do that tomorrow since the guys are going fishing then.
I decided to set up a seperate post for everyone to link up on with your Creativity Wednesdays-please link up here
Welcome all to our Creativity Wednesdays where we share our creative projects with each other (for more information click on photo link in upper right hand column to take you to the introduction page)
Just click on the blue frog button below to open up all the links so you can visit the different posts. and if you wish to join us-just paste your Creativity Wednesdays url post into the space provided to share.
(I am still working on why the links are not showing up right on my post-but they are there)
To spread the word-please include a link in your post to this blog post-thanks-and let's have fun sharing what we love to make. and older posts are welcome-just please include a link back to here

Welcome to our very first Creativity Wednesdays event.
Introduction:
I thought this would be a fun way to share with each other a craft or art project we are working on. I thought we also could share a special recipe you have made and loved or even little projects you have made for your garden or yard. So this sharing event is pretty wide open-just needs to be handmade/ handcrafted.
Linking up with each other:
I checked out two different sites for setting up our links where you put in your url and it appears here in my blog. The two I looked at I did not care for, one I couldn't figure out, (totally not a tech person) and both cost money if you want to upgrade a bit and personalize them to your own link party, so I did not care for that either.
Sooooo I have decided that the simplest is to have you put the link to your Creativity Wednesdays post (not the url to your blog but to that post) into comments for this post. I will then go back into my blog post and set up your link to share.
So let's enjoy each others creativity projects!
Friends linking up:
Deb at Jinxxxygirl
Carole at From My Carolina Home
Carole at From My Carolina Home sharing also a recipe
Tammy at T's Daily Treasures
Wendy at September Violets
Magnoliasntea at Foothills of the Great Smokey Mountains
For my post today I am sharing the hand dye project that I did over the weekend.
When the goldenrod starts blooming in mid September I see pretty yellows in the dye pot. Last year I missed out on natural dyeing as I was in the middle of my living room re do, so of course these past couple of days the goldenrod was calling me in.
I had three skeins of very newbie yarn that I had spun on my wheel Miss Jenny Ashley with commercial roving from the white cheviot breed of sheep.
I first soaked the three skeins in warm water over nite to open up the fibers so they can receive the dye better. I had read this tip in a couple dye books.
The next morning I got out my big dye pots and set up the mordant (fixative-so the color will stick to the wool) I used aluminum sulfate which is the alum used for wool and proteins. I also added in cream of tartar which is to keep the wool soft. (aluminum acetate is the alum used for cotton and cellulose)
Just a note I have looked everywhere for these two alums and finally found them at Earth Hues They are a small company and you just call them up with your order. They send along directions too so I follow theirs for the mordant process.
The hour that the mordant bath is turned off with the wool still in the pot, I started up another pot for the dye bath. I try to just eye ball the amount when working with natural dye stuffs that I collect- I try to double it in weight compared to the wool weight. I used just the flowers-no leaves of the goldenrod and also tansy for this dye pot I did also throw in a handful of marigold petals.
Many dye books tell you to boil or simmer for a couple of hours-I have learned at least especially for yellows that I keep the water just under a simmer for better results. I do this for an hour and then drain out the plants, put back on the fire and add in glauber salts. This is to even out the color better and I read this tip in the dye book Organic Fiber Dyeing The Colonial Williamsburg Method by Max Hamrick
I made sure the glauber salts was well mixed in and then I turned the fire off. I let this cool til the temperature of both the dye and mordant baths are the same-so not to felt the wool. Once they are the same I put the skeins from the mordant bath into the dye pot and stir them around a bit.
This is another one of those things where different sources tell you different things. One will say to rinse the mordant wool well, while others using the alum say to just transfer it to the dye pot.
Once I get the color yellow I like I take it out and drain in a colander squeeze gently and then lay out on towels to dry.
I have learned in the past that at least for me if I leave the yarn in the yellow dye bath too long then the color turns to brown, and most books will suggest to leave in the dye bath over night-for yellows I do not do that anymore.
Once the yarn is dry I let it sit for at least a week before I hand rinse them--and I see that I will need to reset the twist of my beginner yarn as it is now clearly looking like over twisted yarn lol
here are some photos and just click to enlarge
First photo the dye bath of goldenrod, tansy a few marigold petals soaking
Second photo wool skeins just went in the mordant bath-the temperature needs to slowly rise to 200 degrees F and then hold for one hour.
The mordant bath is now up to temperature and holding, I started warming up the dye bath during that hour
Both baths are same temperature so in goes the yarn
This last photo is the yarn now dry so you can see that the color will always be brighter when wet. I am pleased with the results so far, especially since I do have a soft yellow with no turning to browns so far.
I have decided to set up a special day so we can all share our creativity-crafts-art-special recipes and more.
Of course you are most welcome to share this event with your blog friends.
I am choosing Wednesdays and let's call it Creativity Wednesdays.
Any craft or art work most welcome to share. Even a really creative food dish or gardening outdoor projects to make would be most welcome.
I will set up a post with also a link to your blog posts on Wednesdays.
I have set up a little button of sorts for Creativity Wednesdays that when you click on the photo it will take you here to this post--
When visiting on Wednesdays after being directed to this post-just click on my blog title and it will take you to the current post.
Welcome to our Creativity Wednesdays
______________________________________________
Today I finished up flicking the rest of the long romney locks so my basket is full to the top and ready to spin.
This is that romney that the tips were soooo soiled, allot of skirting, and allot of very short locks. I think after dyed the soiled tips will just add some varigated interest to the yarn.
The rest of the washed romney I will handle with carders and make rolags. one of these preps is woolen and the other is worsted I always forget which is which-so will see how different the yarn might be in the end. (click to enlarge photo)
Good morning Wednesday,
Just a thought, I like to share when ever-but would any of you be interested in a day to link up and share your projects??
If so which day of the week, and any thoughts on the name we'll give it so we can share and spread the word.
Wednesdays actually seems like it might be a good option-we already have around blogger T for Tuesday and Five on Friday that I have seen.
Years ago there was Food Fridays which I really enjoyed allot that was way back on Yahoo 360, I also enjoyed Art Sundays and Chicken Tuesdays also started back on Yahoo 360 A fun way to bring people together to visit and grow our blogs.
I will search out a link gadget.
Thoughts??
This past July at the Fiber U event in my nearby town, along with roving, and alpaca socks, I also picked up the jumbo flyer for my Ashford Traveler wheel.
It has been so hot and humid here that I was waiting for a dryer day. This morning early I decided to do this since we have lots of rain coming in. I had also gotten myself side tracked with my drop spindle-which I am so pleased with myself improving-finally. The one skein on the niddy noddy set up so well-I love it. This next spindle full I have the yarn even a little finer-happy dancin'
I wanted to first make sure the maiden fit ok on my wheel and it does. My wheels are both with a dark stain so that is what I used. I did these pieces outdoors and then brought them in for safe keeping-they roll around too easily.
The neat thing about this unit-and Ashford always builds things so well, is that I don't have to change the maiden back for the smaller flyer-they have a little piece that fits into the hole that makes it smaller for the other flyer to fit-love that!
I really can't wait to set this up along with the new flax drive band and play with some art yarn-I think that will be allot of fun.
I did get my quilt finished and off the frame. I need to clear floor space in order to lay this out-and work out the binding. One side has allot of excess that needs to be cut off too. So once I get to that, I will just work up both quilts and get the bindings on.
Busy busy with fall coming in-
(photos will enlarge)
I have been working on this for a few hours each day. It has worked out comfortably to do three rows at a time before moving the quilt on the rollers.
I always start in the middle and then work one side and then go back and do the other side. The second side has gone faster as I know I am almost done so work at it longer.
I forgot that I had planned this side the 4 inch squares-to have one extra row on all sides to use for the binding-I forgot how clever I can be lol
Good morning my friends. We have a cold front moving in this morning with rain-loving it. So I made me a pot of decaf coffee and am enjoying reading blog posts. I really needed to catch up and see what everyone has been doing.
I want to share with you a blog that always has lovely photos and gives me inspiration for my spinning and weaving; especially for garments.
This is saori weaving which is a no rules method of weaving-anything goes-just weave and enjoy the process-no perfection here required. Any size or style of loom is doable-just enjoy and then make something to wear.
Centering With Fiber is the blog and this morning Wow I love the garments she is making. Perfect for beginner spun yarn or bulky art yarn. The post is here This is something I really want to achieve yet is to make me a couple of garments to wear.
Enjoy your weekend.
Good morning Friday
I have really enjoyed spinning with these romney locks with my spindle.
I spin a little and then flick more locks to add to my basket-at this rate I will have this batch finished by end of September or before.
I have been waking up way too early lately and just can't get back to sleep-so I have just gotten up and spun. Very relaxing for me and this morning it's raining-so nice.
I am sitting on a big pillow on the floor with an old flannel backed table cloth and a sheet spread out to contain the soil from flicking the locks-helps keep me more limber getting up and down from the floor too. lol
Also, the yarn is a little more even now too after the first spindle full
Next up to decide how I want to dye this. I have several choices of natural dyes that I bought at Fiber U last year-logwood, indigo powder, madder or the goldenrod has started to bloom too for more yellows. Not sure yet. (photos will enlarge)
Those of you that love sheep and wool and if you love to knit socks; I wanted to share with you a new book I just bought. Just came in the mail yesterday and this is a lovely book. In the Footsteps of Sheep by Zawinski. and the price is all over the place when I searched online up to over a hundred dollars. I found the best price on Amazon with free shipping.

I agree with all the reviews that I read on Amazon that this would have been nicer if it had been a hardcover book instead of just a paper cover but I think they do that to keep the cost down. This will be like reading a good novel I think so will have to be careful with the cover.
Allot of the reviews mentioned they were disappointed that the author did not share a photo of herself spinning-which I can see that would have been nice to include since this is her journey spinning and knitting.
I do love the book so far.
This book is a story about a lady that decided to hike and travel through Scotland with her camping gear, hand spindle, and knitting needles. She wanted to gather loose fleece from the different breeds of native-wild sheep. This book is full of lovely photos and the story of her journey. She is a great story teller. At the end of each sheep breed she shares a pattern for knitted socks.
I almost did not buy the book since I do not knit-but I have a friend that loves to knit socks so I can share the patterns with her. I was intrigued with the tube sock pattern and there was also a pair with sheep motifs using north ronaldsay (which I have-the sheep that live on seaweed)
What creativity projects are you working on??
I am making progress with the knot tying on my quilt-I have one half almost completed. We have had a really busy week so have not been able to work on the quilt every day
Happy Weekend to all of you
When I worked on my wool corner I also uncovered-and remembered some unfinished projects-oh wow - I need to get those done for sure so I can use them. lol so that's what I am working on now as a break from spinning.
Remember the quilt I put on the hand quilt frame with the embroidered blocks with bears and a canoe? I have been struggling with the hand quilting on that-there are so many seams on the backing with all those 4" squares sewn together, and I just didn't like the way my bears were looking-so I decided to take all that embroidering out-flip the quilt over so the 4" patches are up and just tie it together-in the center of each square-it was my thought originally but I thought I would like the hand stitching on this better-Not-lol and I don't need to struggle with stuff like this. When I had sewn all these precuts together I never thought to recheck the measurements - and they were definately not all the same size, so that caused a few problems too for hand quilitng with no puckers etc.
I set this up this afternoon and got it all back on the quilt frame and this is soooo much more doable and will get finished faster-- and we can use it this winter-or I will love it in the living room too. I have extra fabric all around on this side too so I am just going to trim and roll it over to the front for the binding and hand sew it down.-very country for sure.
The third photo is an underneath photo-I only had enough of this off white crochet thread instead of enough of brown or green so just went with it-to use it up and it's already available now and paid for.
This next quilt was buried in a pillowcase and all it needs is the binding sewn on. This quilt has a long story that I won't go into, those of you that follow me will probably remember it from a few years ago. I always loved the colors in this piece. I will share a better photo when I get the binding on.
The next project I uncovered was another wicker basket and it has my rug hooking project I had started. This is probably 3/4's finished so I have this out now too so I can see it and work on it in the evenings.
On my main blog I have a search tool there also, and if you would like to read more about any of these projects search for quilting and rug hooking.
Do you also have unfinished projects that you would love to finish up?
You are most welcome to share with us here in comments.